This week, the crew and I went down to location to figure out just where we were going to place lighting on our set. This visit was one of the most crucial moments of pre-production. The Gaffer, Sound Recordist, Assistant Director, and myself had taken loads of lighting equipment to set during our second visit. This visit definitely gave us some advantages.
The first advantage was that obviously, we were able to figure out how to light each room for every shot in advance. When we go to set on our shooting dates, there will now be no time wasted trying to figure out just how to light our project. We won't be referencing loose diagrams and fixing issues as we go, we will be ready and prepared to set up and get to that first shot in significantly less time.
The second advantage to our visit was that because we have fixed the various issues that come with lighting our particular set space, we will no longer have actors sitting around and waiting to be lit properly. When we can get in the zone and begin grabbing takes sooner, the talent is likely to give a better performance because he or she is not impatient and/or waiting around.
The third advantage to our visit was that we can give our editor something to work with that will get him prepared to handle the actual footage when it comes his way. He can play with various presets to get our footage looking much closer to what we desire when we have finished collecting it.
Finally, because we brought our Sound Recordist, we have some room tone to work with, featuring random creaks in the house, cars passing by, and at some points, rain falling outside and on windows. This will give both her and the editor a sense of what kind of sounds we should prepare to work around in our natural space, since we do not have total control of what's outside the set.
All in all, we came out with some footage that we were happy with, but it is also footage that we can now improve upon when it comes time to actually shoot this thing.
Showing posts with label footage. Show all posts
Showing posts with label footage. Show all posts
Thursday, October 29, 2015


Monday, October 20, 2014
Editing for Dummies!
I promised myself I would never do this. I told myself that I would never ever touch on this subject. Well, unfortunately, it is time. I must delve into a topic that I'd much rather leave alone. A topic that is hitting a little too close to home for my taste. A topic that would possibly tell me that I've been doing it wrong the whole time. That I haven't been doing my job. That I haven't been living to my full potential. It is indeed time...for Editing for Dummies!


I don't like to refer to myself as a "dummy," but I often am. I don't prefer to undermine myself, but I often do. I would rather not make myself, along with everyone I know, realize that I could do so much more than I already do...SO WHY START NOW?! I don't mean to toot my own horn or anything (although this is very exciting news), but it turns out that I've actually been doing [almost] everything I could possibly be doing to help the productions I've worked on in the past.
First, let's get our jobs straightened out. In the world of editors, there are two main positions: the editor, and the assistant editor(s). I say "editor(s)" because, while there can sometimes be only one assistant editor, there's more often than not multiple assistant editors. It's true (probably). Look it up (please don't). In a nutshell, the assistant editors report directly to the editor. They do what the editor tells them to do and the editor does what the director and executive producer tells him to do.
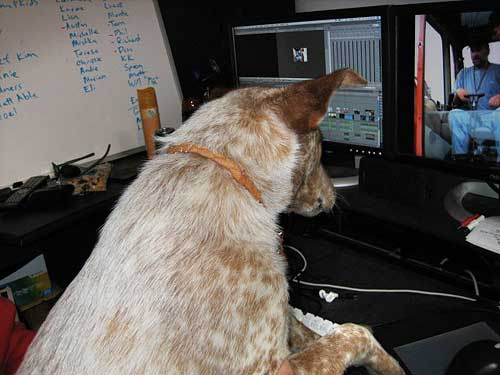 |
| They're worked like dogs...get it? It's funny! |
Let's begin with the responsibilities of the assistant editor, considering that will lead into the responsibilities of the editor. See how organized I am? The assistant editor's foremost job is to log and capture media; basically put all the files onto a hard drive and label them. After the files are logged and captured, the assistant editor organizes them in coordination with the script supervisor's log on an offline edit timeline in a rough cut format. They take the specific clips the script supervisor recommends they use and put together a very rough cut of the film without doing any detailed edits. The assistant editor also keeps a system of backups of all the files and assists the editor in compressing and the timeline and exporting it in multiple formats.
In short, the assistant editor's job is to make the editor's job as painless as possible. They gather and organize everything and even put together a rough cut of the film, pretty much just leaving the more minute, detailed edits up to the editor. Having logged at least a couple thousand files myself, it's not fun. It's definitely not fun. Hats off to you, Mr. and Ms. Assistant Editors!
Now let's move onto the editor. The chief. The head honcho. The top dog. The big cheese. Like I said, the editor is responsible for delegating responsibilities to the assistant editors. Once he/her receives the rough cuts from the assistant editors, the editor takes what they're given and cut, slice, and dice the footage into successive cuts until the final cut is reached.
 |
| An editor looking very deep in thought. |
The editor doesn't only make the meticulous edits and turn the film into the masterpiece it will hopefully become, but they're also the ones who receive all the criticism. They sit down with the director and executive producer on a regular basis to receive criticism about how they can improve their work. It's pretty mentally and physically exhausting! Not only is their work ripped apart by some very important people, but they also work unimaginable hours to change their work so that these very important people like it.
Once the "final cut" is reached (I say "final cut" because, well, the final cut isn't typically reached until the day before the project's hand-in date) the editor often assists the Directory of Photography with color correction and other postproduction effects. There's more often than not other people who are specialized in these areas who are hired for color correction and special effects, but the editor gets some level of input in what is done or how it's done.
The editor's final job is to output the final cut of the film to several formats. The format can depend on who it's being sent to. This can include film festivals, theaters, online, etc. Assistant Editors and Editors have it rough. Their jobs are to basically polish and refine with the very little time and resources that's [most likely] available.
Friday, October 17, 2014
Underwater Filming: Part 3
A couple weeks ago I wrote a few blogs on underwater filming. I have keep up with researching this awesome topic. Here are a few more tips that will help you improve your underwater filming.
Hold Still
Avoid shaky movements. Sounds easy, right? After all, your camera is surrounded by water and should be nice and stable. While it's true that most underwater footage isn't prone to the kind of rapid shake that handheld cameras usually produce topside, any amount of wobble can be extremely distracting to your viewers. Hold the housing as close to your body as possible to help stabilize it, or use a tripod (see tip #3!).
Make sure you keep the camera steady on your subject for long enough to get a good, usable shot. Count to 10 in your head once you've got the subject in frame and don't re-adjust where you're pointing the camera or change the zoom during that time. A 60-second shot full of slight moves, shakes, or zooming isn't really a 60-second usable shot, and it's surprisingly easy to sabotage yourself by thinking you've been "on" something long enough when you never have more than a few steady seconds at once!
Move Around a Little
Videos are more interesting if they contain a variety of shots. So along with all your nice, steady, still clips, you probably want to have a few taken while moving.
Practice panning the camera by twisting at the waist to aim the camera all the way to one side, hitting record, and then slowly unraveling yourself back to the other side (don't try to turn your whole body using your fins as this will introduce more shaking).
Each kick of your fins makes the camera wobble for a moment, so try panning over or past your subject by frog-kicking. If you get a strong enough start, you can film a nice long, stable shot while coasting after each kick.
Use a Tripod
It's almost impossible to hold the camera completely steady, you can get rid of that last trace of shakiness by using an underwater tripod. Several manufactures make mounts for different housing, and tripod legs to suit your diving style and price range.
Using a tripod will kick your macro footage up to the next level. It's also surprisingly useful when shooting wide angle. Extend one of the legs out to one side and use it as a handle to give your housing a wider, more stable platform. Or, extend a leg toward your own body to use as a monopod that braces against your chest.
You can also leave your tripod set up on your subject and swim away - fish are much friendlier to cameras that don't have divers behind them.

Follow the Action
When shooting a moving subject, keep it in frame and with plenty of "headroom" - just like shooting stills, you want to make it look like your subject still has room to move.
You can't follow any critter forever, though, and if you try you wind up with a wobbly shot trying to "catch up" with it. After you've captured some amount of motion, hold the camera still and let the subject swim out of frame to "end" the shot gracefully.
Keep Rolling
Tape and memory cards are cheap - go ahead and take lots of footage! Some cameras take a moment to get rolling after you hit "record," and that usually turns out to be the moment with all the action. If something cool is hanging around in the area, I just leave the camera recording, but put my hand over the lens so I can easily see later that there's nothing "here".
Of course, the flip side of this is that you're going to have way, WAY more footage than anyone should ever be forced to watch. Keep in mind that the more footage you take, the more editing will be required. Some videographers truly enjoy the editing process, but those who don't often learn to be better "in-camera editors," only hitting the record button once they've got their shot all lined up and ready to go.
Get a Variety of Shots
When it's time to edit your video together later, you'll want to have a variety of shots to choose from. In particular, you want to try to get wide (establishing), medium, and close up shots of your subject whenever possible.
Try shooting your subjects from different angles, with different lighting. Take your time and give yourself lots of options for later.
Don't forget the shots that will help glue the story together: divers gearing up or entering and exiting the water, wide angle shots showing the overall appearance of the dive site, empty shots of blue water or diver bubbles that can be useful while running credits, etc.
White Balance
Get familiar with your camera's white balance functions. If you're shooting macro with lights, you can probably just leave it on 'auto.' But if you're using ambient light, even with a red filter, manual white balance is going to be your friend.
Manual white balance normally entails pointing the camera at something white (or close to white) and hitting a button, or an annoying series of buttons. Sand usually works, though in some locations the sand has too much red or yellow in it to make a good white card. Dive slates can work, but may need to be held at a bit of a distance and slanted so they aren't glaringly reflective. If all else fails, point straight up towards the sun (or make your buddy wear white fins).
It's often tempting to stop fiddling with white balance and just "fix it in post." But trust me: fixing it in the camera will look much better!
Ambient light and red filter; manual white balance.


Know When to Use Lights and Filters
Here are my rules of thumb - with the caveat that your mileage may vary based on your camera's performance in different lighting situations:
Wide-angle, 45' or shallower: Use a red filter and ambient light. Manual white balance whenever you change depth or the lighting changes.
Wide-angle, deeper than 45': if shooting something close, turn on your lights (extended above and to the sides of the housing to cut down on backscatter) and remove the red filter. If you're trying to shoot something larger than the area illuminated by your lights, you may just have to settle for having extremely blue footage. Putting the red filter on may help you white balance, but at depth it also cuts out way too much light and leads to grainy footage.
Macro: lights on, no red filter. Experiment with different light locations. I usually put one light right next to the lens aiming directly at the critter, and use the other light to backfill some of the shadows from the side or above.
Check Your Footage
Those tiny little screens on video cameras help you figure out where to aim, and hopefully tip you off if you're terribly out of focus or badly white-balanced. But to really get a good look at your footage, you need to look at it on a big screen.
Often I've taken what I thought was great footage - only to play it back on my HDTV at home and discover there's a bit of dust on the inside of the lens that mucked up the autofocus. If you're traveling and go days without really looking at your footage, you can miss things that ruin days of footage, so it's worth it to take the time and make sure you're getting the results you want at full resolution!
Friday, September 19, 2014
Practical Effects: The Real Magic Tricks of Filmmaking
Special effects in filmmaking could be summed up into two different styles: visual effects, and practical effects. Visual effects usually involve editing the footage in post-production, while practical effects are done live in front of the camera. Visual effects can have a really cool effect when used effectively, like in this summer's blockbuster film, "Maleficent". Of course everything you see is fake and created on a computer, but the movement of the camera makes the scene very compelling.

So. Visual effects can be pretty cool. But I'm here to talk about why practical effects are way cooler.

Why are they way cooler?
Well, many reasons. For one the shot is going to have a timeless effect and will look real 100 years from now because, well, it is real. Visual effects however are very time sensitive. These magical, awe-inspiring scenes we see now will look laughable in a few years. But that's how technology works.
Check out these two scenes below...
The first one is from Terminator 3, where they flipped a massive construction vehicle using computer-generated visual effects. The second one is from the Dark Knight, where they do almost the same stunt except they actually flip the truck.
Now to be fair some might jump up and say the Terminator version is better because the truck is seen crunched in to the ground, tires flying through the air, and of course a nice big explosion to finish.
But sorry, you're wrong.
Consider this analogy....
The Dark Knight's effect is like a gourmet selection from that restaurant down the street...

...and The Terminator's visual effect is like a #2 from Panda Express with extra meat.


Check out these two scenes below...
The first one is from Terminator 3, where they flipped a massive construction vehicle using computer-generated visual effects. The second one is from the Dark Knight, where they do almost the same stunt except they actually flip the truck.
But sorry, you're wrong.
Consider this analogy....
The Dark Knight's effect is like a gourmet selection from that restaurant down the street...
But consider this analogy for a second. Even though Panda Express is of less quality, overall it's a better deal. You're getting a lot more food for a lot less money. There's plenty like about it... but little to appreciate. You will not eat Panda Express in small bites and appreciate the amount of work it took to create such a masterpiece. It's just something that will make you happy in that moment. And minus the painful poo afterwords, that's exactly what the Terminator 3 effect is. It's just a cheap audience pleaser.
I hope a few of these behind-the-scenes videos below will help convince you:
First off, The Dark Knight flip:
Come on... that's just FRIGGIN COOL.
For any of you that have seen Inception, you may remember the scene when Joseph Gordon-Levitt is in a fist fight whilst flying all across a room because of changing gravity. How do you create the effect of a room rapidly changing gravity? How about RAPIDLY CHANGING THE GRAVITY?
This next video is from "Edge of Tomorrow", a film I expected to be a horrible flop. Tom Cruise stuck reliving to same war scene day after day? Sounded to me like an excuse for big explosions and no story at all. But the reviews came out and they were actually really positive. I couldn't believe it. I had to see what all the huff was about, and I was indeed pleasantly surprised by the engaging story. The story does of course include several explosions and battle scenes, but I remember thinking that they were acted out very well. That is, the actors seemed to be reacting to their environment quite realistically. After watching this video, I realized why. This video features several small clips, but the most impressive clip is at 2:58. It's truly incredible and I don't think many actors could pull it off besides Tom Cruise.
Of course there are many other notable films that are famous for their use of practical effects, but I hope this gives you an introduction to the fine art and precise skill of these types of effects. They are dangerous, expensive, and difficult, but that's why they deserve so much appreciation.
Crave that gourmet shit.
Subscribe to:
Posts (Atom)