It only took one day back from break and I am feeling just as stressed as the week before we shot our film, if not more. So I thought I'd blog twice this week, to take care of next week's now, because next week I will be editing audio LITERALLY ALL WEEK. (Help me).
I feel an array of emotions now when I walk into Fiction Field. I'm happy. I'm angry. I want to cry. I want to go home. I used to be so eager to make videos, but now thinking about producing a project just gives me a headache. Thinking about all the planning, arguing, coordinating, failing, changing, adjusting--it makes me very, very anxious.
I sometimes regret taking Fiction Field 2, not because I didn't learn (I learned A LOT) but because it's caused me so much stress this semester that I reached out to CAPS to seek help. I've been having problems because many components of this project are out of my control. We couldn't shoot at an earlier date because of scheduling conflicts. I can't get the picture lock of the film done because I'm not editing. I can't score the film. I have to rely on many other people for this. And I know that's part of life.
I don't believe I have enough time to edit the sound for this project. I will get it done, but I don't think it will be the best it can possibly be. Typing that physically hurts me.
I wanted this project to be something that I would be extremely proud of. I wanted people to see it and say "Wow, Sam was a part of that? That was really good." But now I'm afraid people will hear it and see my name in the credits and think, "That girl had no idea what she was doing." It is partially true that I don't have any idea what I'm doing. In this class and in life. I'm trying to do my best.
I just want to enjoy what I do and right now I'm not enjoying it at all. Next semester I plan on taking a step back from many extracurriculars and trying to work in smaller groups. I also plan to focus more on my mental and physical health. If you read this blog, please don't bring it up to me in class. It's sort of an automatic response now for me to start crying when I remember how stressed I am.
Thank you.
Showing posts with label editing. Show all posts
Showing posts with label editing. Show all posts
Monday, November 30, 2015


Thursday, October 29, 2015
Chroma-ing: It's easier than you might think
One facet of movies or shows that can be super important is the use of green screens, or other screens to fulfill the same variety. These can be used to add in background animations or scenery shots to add some variety into whatever is being edited. First, to add the chroma key, select the clip that you want to add the chroma into. In the effects panel in the bottom right, click on the folder that says "video effects", and then in that folder click on "keying". There are a few different options, but the most simple option would be to select "Ultra Key". Drag this onto the clip in your sequence, and you will now be able to edit the chroma in the clip panel in the upper left corner. Make sure that the background chroma is on the lower level than the clip you want to add it to, so have the clip with the green screen on track 2 and the thing you want to chroma in on track 1. Then, take the eye dropper tool and click on the green, or whatever color you want to chroma out, and at this point, you should see the background change. It still may not look perfect yet, though, as shadows and different lighting conditions might not create a clean chroma. Took fix this, in the same panel as the eye dropper, there should be a few options, like "matte cleanup" with different sliders altering shadows and choke. Once fiddling around with these, your overall shot should be done and looking nice. A good chroma can end up improving shots and adding much needed variety.


Wednesday, September 16, 2015
The Anatomy of a Split Second
Personally, I love watching commercials. I never skip the channel in the middle of a programming because I enjoy the small 4-5 short stories that are shown in the breaks. One reason why I like them so much is because of the some of production techniques involved can be really cool and innovative. A lot of technique is necessary to pack a story while promoting a product in under 30 seconds. One method of catching the audience's attention is using inventive post production and graphic animation to embellish the commercial. I ran into this one commercial made by the BBDO branch in Ireland for the Road Safety Authority there.
I really liked how they used a simple looping editing technique to build tension and leave an shocking impression. Directing comes heavily into play here to uniquely tell a story using formal techniques. If this leaves you with an impression like it did with me, then I think it's safe to say this ad got its message across clear.
I really liked how they used a simple looping editing technique to build tension and leave an shocking impression. Directing comes heavily into play here to uniquely tell a story using formal techniques. If this leaves you with an impression like it did with me, then I think it's safe to say this ad got its message across clear.
Wednesday, September 9, 2015
Life, sleep deprivation, and the pursuit of editing
There are many jobs on a crew that are not valued enough—script supervisor and assistant editor being two significant ones. Script supervisor keeps a written track of which takes were best, along with a description of what went on, while assistant editor goes through all of the footage and describes what’s going on in the frame, type of shot, etcetera.
This summer I did just that—I spent a great deal of time logging footage for a professor’s reality-esque TV show. While doing so, I came to understand something truly important: there is no insignificant role when it comes to production. I went through hours of footage and mark the funny and controversial points between the couples; a very tedious task that took many hours at a time. This job is usually bestowed upon the assistant editor, as they are the ones that do the initial read of the script supervisor’s notes and choose which clips are correct. I also helped to add more detail to the script sup’s notes so my professor could use it to teach in the future.
Going into the process I thought I would like it because I enjoy editing, but I forgot about the many hours that are spent staring at a screen. A certain professor told me that when you start in the real world of post-production, logging is where you initially start. But it truly makes editing so much easier when you have a guide as to what clips are the best.
While it is not my preference, I definitely learned a lot about how to make the process of editing easier. I have great respect for those who regularly script super & log the footage.
Just for funsies, I shall leave you with a related video some of you may have already seen and can relate to:
 |
| Blank sample of script supervisor's daily log. |
 |
| Blank sample of editor's log. |
 |
| ~me~ most of the time I edit |
Going into the process I thought I would like it because I enjoy editing, but I forgot about the many hours that are spent staring at a screen. A certain professor told me that when you start in the real world of post-production, logging is where you initially start. But it truly makes editing so much easier when you have a guide as to what clips are the best.
While it is not my preference, I definitely learned a lot about how to make the process of editing easier. I have great respect for those who regularly script super & log the footage.
Just for funsies, I shall leave you with a related video some of you may have already seen and can relate to:
"The Assistant Editor Song"
Monday, October 20, 2014
Editing for Dummies!
I promised myself I would never do this. I told myself that I would never ever touch on this subject. Well, unfortunately, it is time. I must delve into a topic that I'd much rather leave alone. A topic that is hitting a little too close to home for my taste. A topic that would possibly tell me that I've been doing it wrong the whole time. That I haven't been doing my job. That I haven't been living to my full potential. It is indeed time...for Editing for Dummies!


I don't like to refer to myself as a "dummy," but I often am. I don't prefer to undermine myself, but I often do. I would rather not make myself, along with everyone I know, realize that I could do so much more than I already do...SO WHY START NOW?! I don't mean to toot my own horn or anything (although this is very exciting news), but it turns out that I've actually been doing [almost] everything I could possibly be doing to help the productions I've worked on in the past.
First, let's get our jobs straightened out. In the world of editors, there are two main positions: the editor, and the assistant editor(s). I say "editor(s)" because, while there can sometimes be only one assistant editor, there's more often than not multiple assistant editors. It's true (probably). Look it up (please don't). In a nutshell, the assistant editors report directly to the editor. They do what the editor tells them to do and the editor does what the director and executive producer tells him to do.
 |
| They're worked like dogs...get it? It's funny! |
Let's begin with the responsibilities of the assistant editor, considering that will lead into the responsibilities of the editor. See how organized I am? The assistant editor's foremost job is to log and capture media; basically put all the files onto a hard drive and label them. After the files are logged and captured, the assistant editor organizes them in coordination with the script supervisor's log on an offline edit timeline in a rough cut format. They take the specific clips the script supervisor recommends they use and put together a very rough cut of the film without doing any detailed edits. The assistant editor also keeps a system of backups of all the files and assists the editor in compressing and the timeline and exporting it in multiple formats.
In short, the assistant editor's job is to make the editor's job as painless as possible. They gather and organize everything and even put together a rough cut of the film, pretty much just leaving the more minute, detailed edits up to the editor. Having logged at least a couple thousand files myself, it's not fun. It's definitely not fun. Hats off to you, Mr. and Ms. Assistant Editors!
Now let's move onto the editor. The chief. The head honcho. The top dog. The big cheese. Like I said, the editor is responsible for delegating responsibilities to the assistant editors. Once he/her receives the rough cuts from the assistant editors, the editor takes what they're given and cut, slice, and dice the footage into successive cuts until the final cut is reached.
 |
| An editor looking very deep in thought. |
The editor doesn't only make the meticulous edits and turn the film into the masterpiece it will hopefully become, but they're also the ones who receive all the criticism. They sit down with the director and executive producer on a regular basis to receive criticism about how they can improve their work. It's pretty mentally and physically exhausting! Not only is their work ripped apart by some very important people, but they also work unimaginable hours to change their work so that these very important people like it.
Once the "final cut" is reached (I say "final cut" because, well, the final cut isn't typically reached until the day before the project's hand-in date) the editor often assists the Directory of Photography with color correction and other postproduction effects. There's more often than not other people who are specialized in these areas who are hired for color correction and special effects, but the editor gets some level of input in what is done or how it's done.
The editor's final job is to output the final cut of the film to several formats. The format can depend on who it's being sent to. This can include film festivals, theaters, online, etc. Assistant Editors and Editors have it rough. Their jobs are to basically polish and refine with the very little time and resources that's [most likely] available.
Friday, September 26, 2014
Prelude Workflow: Really I Love Bread Eating
A Prelude can be described as, “Something that comes before and leads to something else.” When it comes to naming programs, Adobe seems to have it right. While many are familiar with the editing software, “Adobe Premiere Pro,” just as many are unfamiliar with it’s lesser known brother, “Adobe Prelude.” Designed specifically to work in conjunction with Premiere Pro, Prelude is designed to speed the review, ingest, logging, selection, and export of tapeless media.

In short, Prelude helps speed up the arduous naming, reviewing, and selection of footage. Furthermore, by transcoding your clips to a more manageable file type you’ll eliminate the headaches when trying to export your film. Specifically, Prelude allows one person to review and capture all footage, build a selects reel, and INSTANTLY export it into Premiere Pro CS6, or Final Cut Pro, so that the editor can begin editing immediately.

Can you imagine? You only have to export your film once. Nothing dropped, no errors, NO MESS! And you thought it could only happen in your dreams.
All those student editors out there, I have even more good news. If you’re a competent editor and aren’t horrible to be around you’ll probably end up with a job. The cool thing about having a job is that you earn money. This news isn’t so great for producers though.
“Someone using Prelude is not editing, they are collecting and organizing clips, and putting them all into one spot for the editor.” -Larry Jordan, Author of "Edit Smarter"
 If you don’t need an editor to use Prelude, then why pay someone $40 an hour when you could pay a Production Assistant $7.64 to go through the Prelude process and save some bucks where you can. Now I have some bad news for you student editors out there. I just lost us some easy money. Now the production assistants are going to take our jobs. Sorry about that.
So hopefully by now I’ve convinced you that Prelude could, potentially, increase the efficiency of the editing team. But how does one go about actually using the software? In order to understand Prelude’s workflow, one *must remember the acronym: RILBE.
R: REVIEW clips from camera, card, or hard disk
I: INGEST just the clips, or portions of the clips that you need
L: LOG clips to add comments, and select the good clips
B: BUILD a rough-cut of selected clips to send to the editor
E: EXPORT the rough-cut to Premiere Pro (technically you could also export to Final Cut 7 but that’s not our focus for today)
I came up with a great phrase to remember the acronym: “Really I Love Bread Eating.” This works for me because, well, I really love eating bread. But you all can use it too if you want. Or you can create your own fun way to remember the correct sequence of the Prelude workflow. The ball is in your court.
Let’s start with the R— Review clips from camera, card or disk.
When you first open Adobe Prelude, you’ll notice that it possesses that classic Adobe aesthetic.

I feel at home already. Once you create a project, you’ll find that you’ve landed in the INGEST workplace. I know what you’re thinking— “Wait, Erin, the ingest workspace? But Ingest is the SECOND letter in the RILBE acronym.” Good catch! But actually, dear reader, the Ingest workspace is exactly where we need to be. This workspace allows you to review clips before you capture and transfer them to your hard disk from the camera, card, or hard disk where the source masters are stored. While revising the clips are important, I find this particular workspace the best place to label all of my clips.

Let’s move on to the second letter of the Prelude workflow acronym, INGEST.
When Adobe says “ingest” they really just mean “transcode.” When you ingest an apple you change the composition of the apple. And when your body is done editing out all of the nutritious pieces of the apple, you end up “exporting” something completely different altogether. The benefit of ingesting clips is that you can transform the footage to a myriad of more manageable file types. This will save you the hassle of running into exporting errors later. Would you want to eat an apple without chewing it first? Prelude “chews” the clips before they seriously mess up your editing timeline. But what clips to chew? It’s common knowledge that transcoding large video files can take hours, days, even years to complete. Adobe offers several solutions to this.
Solution number 1:
Clear your schedule for the week and ingest every damn clip
Solution number 2:
Clear an hour of your schedule and ingest all of the clips you know, or think that you may use in your final edit.
Solution number 3:
Adobe allows you to pre-select portions of clips to ingest. Technically, you could select all of the in and out points of each clip and only ingest those specific clip bits. I caution you against doing this, however, because not importing the entire clip makes it fairly difficult to change your mind about things like length when they’re exported into the editing timeline.
I’m not going to tell you which solution is the BEST one, but it’s 2. Solution 2 is most likely the one that you’re going to want to go with. Ingesting clips is as simple as clicking the checkbox on the lower right corner of the thumbnail, selecting the format you want said clip transcoded to, and proceeding to push the big Ingest button in the lower right corner of the Ingest Workspace. The formats that are understood by editing softwares best (Apple ProRes, DNxHD, CineForm etc.) all require you to create a custom transcoding preset within Prelude. Once complete, the Adobe Media Composer will pop up and ingesting ensues.
Here’s a great video on how to create custom presets in Adobe Prelude:
(thanks Arturo)
 Reviewing footage and transcoding files into entirely different formats is not the only things that the ingest page is good for. Prelude is designed so that you can provide a link to the media (for tagging, and searching purposes) and you can copy media/ save your work to an unlimited number of destinations. That means you can save it to ALL of your hard drives. At this point I’m sure that you feel quite overwhelmed with the number of dreams Prelude is making come true for you.
Now comes the 3rd step in our Prelude workflow— LOGGING
Logging is my favorite RILBE action because it involves the use of colorful markers. Each colored marker indicates something different when used on a clip so it’s very important that you become familiar with each marker’s use. Imagine if Van Gogh didn’t know what the blue marker did?
“Starry Night you call it? By golly that could be a picture of anything Vanny old chap!” < This quote is fictitious in content as well as inaccurate in terms of culture, time-period, and vernacular.
.jpg)

While each color marker has its place, the most useful (in my opinion) is the blue “sub clip” marker. You can create sub clips, also known as clips within clips, by selecting in and out points with the blue marker. The sub clips will then be saved and marked (Command+S) when you end up importing the re-furbished footage into Premiere.
See, even Vincent Van Gogh likes blue best.
-1.jpg)
Which brings us to the 4th letter in the RILBE Prelude workflow acronym— Building a Rough Cut.
This step of the Prelude is optional especially if you’re giving the job to production assistants rather than your editor. However, you can create a rough cut by double clicking the rough-cut icon and opening the rough-cut workspace. In a circumstance where the editor is not the person working in Prelude, the stand-in may take on the responsibility of assembling the good takes in one place so the editor wastes less time reviewing each and every take. If you do decide to make a rough-cut in Prelude, be sure to select File > Save before going on to the very last step of RILBE.
EXPORTING:
One of Prelude’s greatest attributes is it’s ability to transfer files to Premiere Pro unbelievably quickly. By selecting, File > Send to Premiere Pro, a new timeline will appear in Premiere and your clips will be transferred almost instantaneously. (This knowledge makes the transcoding process much more bearable to sit through.)

So that’s the end of this Prelude. Don’t you worry, there will be much, much more to come. Until then, Really I Love Bread Eating. Cheers!
Friday, September 19, 2014
Shooting 4K films on your iPhone?
So we all know about the new beautifully clear 4K TVs and more importantly, 4K filming cameras. Now that they've been out for a couple months prices haven't started to calm down and they are a bit more affordable. Since it has come out though new technology around 4K filming has emerged. Other than the 8K TVs and whatever else they have now, they've developed a new way to film 4K film without buying a 4K camera. Recently an app has been developed for the iPhone that seeks to bring 4K filming, editing, and delivery for phones everywhere at a big price.
 The app known as "Vizzywig" is estimated to cost an estimated $1,000. It will allow you to film at 24 high resolution frames per second at a data rate of 72MB/s. The creator Michael Zaletel made the app in such a way that it allows you to actually add transitions titles, music, ect. Currently the app is only available for IOS 7 and IOS 8 and requires at least 32GB or 64GB memory card.
This addition to the iPhone is revolutionary for filmmakers everywhere and even the common folk. Having this ability can greatly impact the average persons ability to make great films. It is definitely upping the popularity of film making. For more information view the link and watch the attached video to see what you can do.
http://nofilmschool.com/2014/09/you-can-now-shoot-glorious-4k-video-your-iphone-itll-cost-you
This addition to the iPhone is revolutionary for filmmakers everywhere and even the common folk. Having this ability can greatly impact the average persons ability to make great films. It is definitely upping the popularity of film making. For more information view the link and watch the attached video to see what you can do.
http://nofilmschool.com/2014/09/you-can-now-shoot-glorious-4k-video-your-iphone-itll-cost-you
Friday, September 12, 2014
SO YOU WANNA BUY A HARD DRIVE: PART II (Speed)
So you wanna buy a hard drive. If you’ve read my last post, “If You’re Gonna Shake it Back it Up,” you know that I’ve gone through a lot of hard drives. I mean, A LOT. I’ve lost them, dropped them, overheated them, you get the picture. However, because I’ve had to say goodbye to so many hard drives, I’ve also gotten really good at, well, buying external hard drives. And that’s why you’re here. Whether you’re a video game enthusiast, an editor, a photographer, an accountant, or a working mother of 9, somewhere out there is an external hard drive just waiting to back up your life.
SO YOU WANNA BUY A HARD DRIVE: Part II (SPEED)
Before you even THINK about purchasing a new hard drive, you need to consider SPEED. By “speed” I am of course referring to the rate that your external drive read/writes/transfers data, not the illegal substance. Still, I have heard that the drug “speed” is a great way to be productive for weeks on end— you don’t even have to sleep! I’m getting ahead of myself. Back to the hard drive thing:

In my last post I discussed the difference between Solid State Drives (SSD), and Hard Disk Drives (HDD)— speed and price being the main distinguishing characteristics of the two drives. Solid state drives are exponentially more expensive than hard disk drives because they are capable of transferring files at an extraordinary rate. Before you decide to splurge, however, I must caution you: Your external hard drive is only as fast as the CONNECTOR you utilize when transferring files. Here’s what I mean: Most consumer external HDD drives nowadays come packaged with a USB 3.0 connector cable and/or a Firewire cable. The main reason for this is that most computers either have USB 3.0 capabilities, or a firewire port. If you’re still using USB 2.0 it’s probably a good time to update your computer.
 You can buy the most expensive, speediest, thunderbolt solid state drive on the market, but if your 13 inch macbook that your uncle gave you three years ago doesn’t have a thunderbolt port, that drive isn’t going to move any faster than your $50 USB 2.0 compatible drive will. eSATA, for example, is one of the most expensive external hard drive interfaces, theoretically capable of (3000Mbps). That’s literally an entire order of magnitude faster than USB 2.0. Still, eSATA doesn’t provide power through the connector cable which means it requires either a USB cable for power, (AKA the data will travel at USB speeds making the fast speeds of eSATA irrelevant), a combined USB/eSATA cable and connecter, or an external AC adapter. Make sense?
Let me break it down for you. Here are a few of the most common external drive connectors ordered from fastest to slowest:
 Thunderbolt: Thunderbolt devices can be daisy-chained together to work with one connector on a laptop or desktop. Also like FireWire, the Thunderbolt interface can be used to boot a Mac (USB boot drives may not work on some Macs). Best of all, the Thunderbolt 2 interface has the fastest theoretical throughput: up to 20GBps. That’s speedy enough to transfer a full-length, high-definition movie in less than 30 seconds! It remains to be seen who adopts Thunderbolt aside from Apple. AMD has announced a competing technology called "Lightning Bolt," but it remains to be seen if much interest here will be in a competing interconnect technology.
USB 3.0: USB 3.0 is becoming the port of choice because it provides faster transfer speeds than eSATA and USB 2.0 and requires minimal fuss— (almost all desktop and laptop PCs come with USB ports.)
FIREWIRE: Almost as common as the USB 3.0, Firewire is faster than USB 2.0 and is good for daisy chaining several drives/devices to a single port. The most recent Mac’s don’t come equipped with a firewire port so this can cause potential compatibility problems in the future. Luckily, most consumer external drives come with a USB 3.0, as well as a firewire cable in order to remedy this particular issue.


USB 2.0: USB 2.0 is by far the slowest method of data transferral. No one buys anything new that is only USB 2.0 compatible other than old people and “bargain” hunters. I like to think of a USB 2.0 connector like the Internet Explorer of the connector interface world.

PC Magazine gives some advice about what to do depending your computer’s connector interface compatibility:
“If you are transferring lots of files over a speedy interface like eSATA (fast),USB 3.0 (faster), or Thunderbolt (fastest), then by all means go for the 7,200rpm (HDD) drive. However, if you're limited to USB 2.0 or FireWire 400/800, then trade speed for capacity and get the largest 5,400rpm (HDD) drive that your budget allows. If all out speed is your goal, multiple drives (7,200rpm, 10,000rpm, or SSD) over Thunderbolt 2 is the fastest (and most costly), with a single SSD connected via Thunderbolt or USB 3.0 as next fastest, and so on.”

When it comes to convenience, USB, Thunderbolt, and FireWire all provide enough electrical power to run an attached drive, (unlike eSATA), so the only cord you’ll need to carry with you is the appropriate interface cable. This leads us to the topic of next week’s blog: portability and drive security.
An Aside: Consider Yourself an Editor?

As someone who spends a fair amount of time editing video, I can be more specific about what speeds work best when you’re working with large files. As an amateur editor, you can get away with using a Firewire 400; but that’s the bare minimum you’re going to want to go especially if you don’t want any delays when scrubbing through your timeline. A thunderbolt connector interface, of course, remains the most optimal method of data transfer. I would recommend using a Thunderbolt, USB 3.0, or Firewire 800 connector in conjunction with a 7200 RPM hard disk drive. Next week I’ll be talking more about portability, but as an editor you should look to the future when buying expensive drives. Sure, 1 Tb MyPassport drives might cheap and convenient now, but these drives are meant for storage and often overheat/crash when they’re edited on for extended periods of time. Instead, it’s much more worth your money to buy a hard drive that is built to manage active files (active drives are usually equipped with an internal fan that prevents the drive from burning itself up.) While they may be more expensive up front, active drives are much less likely to crash and delete all of your current projects.
Monday, September 1, 2014
Zumbrunnen's 5 Stages of Editing
I stumbled across an article earlier this month that's titled "How Spike Jonze's Films Come Together in Editing." When seeing the link, I thought to myself, "How convenient! I love Spike Jonze and I tolerate editing! Let's take a look." So I did. While much of the article discusses the happenings at the most recent American Cinema Editor's EditFest LA at Disney's Frank G. Wells Theatre, there was a small piece of the article which I wasn't expecting.
Eric Zumbrunnen—whose collaboration with Spike Jonze began with editing in the music video industry—joked at EditFest that there are pretty much five main steps in the editing process for any project. Whether he was actually joking or not, he hit the nail right on the head.
It's going to be amazing.
 This is the first stage of the editing process. Now, it doesn't actually involve any physical editing, but more visualizing than anything. More often than not, editors are never on set when the projects are being shot; therefore, we never see what mistakes (usually continuity errors) are being made during production. This stage involves a whole lot of naïvety (Yes, that's a word. I checked.). Editors usually sign onto projects that they're excited to work on and that they have a lot of faith in. We have to. We're looking at the same film for weeks, even months on end. At this point in the process, we have the utmost confidence in the crew's ability to hand us something spectacular to get working on.
I don't know what I can do with this.
 After having the mentality that he's about to help create one of the greatest films of all time, the editor is handed the first batch of footage. "What is this shit? You've got to be joking." This is when the work really begins. The footage never—I repeat—NEVER turns out the way you had imagined it in your mind. All those hours of visualizing the perfect scene, the most perfectly timed cuts an editor has ever made, gone straight down the drain with what looks to be the most horrible shots ever taken on a camera. "What were they thinking? What am I supposed to do with this garbage?" Now, it's never anywhere close to as bad as it is in your mind, but it's nothing like you imagined and it's terrifying. Sometimes you're just handed shit. It's the sad truth.
What if everyone finds out I'm a fraud?
 It's getting to the point when you've been making the first cuts on the same 2-minute scene for twelve hours and there seems like there's no way out of that one horrible, horrible continuity error. There's nothing you could ever dream of doing to get around it. Jesus himself couldn't fix it. "Who would ever think I could cut this together?" This stage is pretty much the same as the previous one, but after the stress and frustration really set in. Up to this point in your career, you've been fairly confident in your skills as an editor. You started out small, but have worked your way up to some pretty notable projects. This is, however, the moment all editors have during every editing job where they feel their career is over. If this problem isn't taken care of, you're done. Finished. You'll "never work in this town again." Basically, you're screwed.
Damn the deadline.
 "Is it even possible? Could anyone do this?" Where'd the time go? Well, while you were slaving away at your computer for the past few weeks, everyone else on the crew was celebrating the fact that they wrapped the film. Sure, your work probably extends over a fraction of the amount of time that the rest of the crew had to work on the project, but—as everyone believes is the case for themselves—your job is significantly more difficult than everyone else's. It's a couple days before you have to hand over your newest cut of the film to the director and you have nothing to show for it. After the endless hours of blood (not really), sweat (of course), and tears (you betcha) it seems like it's impossible for you to ever turn it in on time.
I'm a genius.
 "Damn, I'm good. Like I'm really good." You just finished your nth cut of the film and it looks damn good. It probably won't be the last one, but you now have some serious proof of your skills. You're bragging to the director. "You see right here? Where he does this? Well, he actually kept doing this, so I used this to cover up that and now he does this." You can't stop smiling and basking in the glory that is this new work of art. No one will ever truly comprehend what you had to do to make the final product, but it's fine. It's totally ok. Because you'll tell each and every friend and family member about it in extreme detail after the premiere.
Eric Zumbrunnen—whose collaboration with Spike Jonze began with editing in the music video industry—joked at EditFest that there are pretty much five main steps in the editing process for any project. Whether he was actually joking or not, he hit the nail right on the head.
It's going to be amazing.
 This is the first stage of the editing process. Now, it doesn't actually involve any physical editing, but more visualizing than anything. More often than not, editors are never on set when the projects are being shot; therefore, we never see what mistakes (usually continuity errors) are being made during production. This stage involves a whole lot of naïvety (Yes, that's a word. I checked.). Editors usually sign onto projects that they're excited to work on and that they have a lot of faith in. We have to. We're looking at the same film for weeks, even months on end. At this point in the process, we have the utmost confidence in the crew's ability to hand us something spectacular to get working on.
I don't know what I can do with this.
What if everyone finds out I'm a fraud?
 It's getting to the point when you've been making the first cuts on the same 2-minute scene for twelve hours and there seems like there's no way out of that one horrible, horrible continuity error. There's nothing you could ever dream of doing to get around it. Jesus himself couldn't fix it. "Who would ever think I could cut this together?" This stage is pretty much the same as the previous one, but after the stress and frustration really set in. Up to this point in your career, you've been fairly confident in your skills as an editor. You started out small, but have worked your way up to some pretty notable projects. This is, however, the moment all editors have during every editing job where they feel their career is over. If this problem isn't taken care of, you're done. Finished. You'll "never work in this town again." Basically, you're screwed.
Damn the deadline.
I'm a genius.
 "Damn, I'm good. Like I'm really good." You just finished your nth cut of the film and it looks damn good. It probably won't be the last one, but you now have some serious proof of your skills. You're bragging to the director. "You see right here? Where he does this? Well, he actually kept doing this, so I used this to cover up that and now he does this." You can't stop smiling and basking in the glory that is this new work of art. No one will ever truly comprehend what you had to do to make the final product, but it's fine. It's totally ok. Because you'll tell each and every friend and family member about it in extreme detail after the premiere.
Sunday, December 15, 2013
On To The Next One
We are finally done. This whole semester has been a whirlwind of stress, sleeplessness, and getting equipment from PPECS. However, it has been the best semester of my life. Fiction Field 1 was a completely different world compared to Intro to Field. I went from making 1-3 minute videos to making 20 minute short films in a years time. I learned so much about everything film and media involved this semester and I am so happy for it.
I have always been one to learn from my mistakes and Arturo will definitely make sure you know if you have made a mistake. While during class you are stressing out, waiting for him to call out the next error that will increase the number butterflies flapping in your stomach, afterwards you realize "hey, that was really stupid of me but, I will never make that mistake again, and I'm a better filmmaker because of it."
My editing skills have had the most progression out of all my skills, after major critiques from lots of people I have really started to settle into my editing niche. I just started editing the Fall Semester of my Freshmen year and I have really found a love for it. Actually compiling the story that you captured is a very rewarding experience. I also believe being a good editor will help me down the road with directing films because thinking about post during production is better then fixing something in post.
As a director I really wished I had been more forward with the actors then I had been. I believe this would have solved some problems with not liking the delivery of certain lines, and ending up with a take that was acceptable but not the most desired take. I let the actors interpret their character too much rather then really breakdown the character individually with them.
I look forward to continuing in this amazing industry. The key is just to keep shooting and I believe if I do this I will really find my style of cinematography. I loved being on set, and I loved hearing all of Arturos crazy stories, and ingenious methods of problem solving. This was my favorite class and I learned so much as well as got an awesome starter film for my demo reel.
I have always been one to learn from my mistakes and Arturo will definitely make sure you know if you have made a mistake. While during class you are stressing out, waiting for him to call out the next error that will increase the number butterflies flapping in your stomach, afterwards you realize "hey, that was really stupid of me but, I will never make that mistake again, and I'm a better filmmaker because of it."
My editing skills have had the most progression out of all my skills, after major critiques from lots of people I have really started to settle into my editing niche. I just started editing the Fall Semester of my Freshmen year and I have really found a love for it. Actually compiling the story that you captured is a very rewarding experience. I also believe being a good editor will help me down the road with directing films because thinking about post during production is better then fixing something in post.
As a director I really wished I had been more forward with the actors then I had been. I believe this would have solved some problems with not liking the delivery of certain lines, and ending up with a take that was acceptable but not the most desired take. I let the actors interpret their character too much rather then really breakdown the character individually with them.
I look forward to continuing in this amazing industry. The key is just to keep shooting and I believe if I do this I will really find my style of cinematography. I loved being on set, and I loved hearing all of Arturos crazy stories, and ingenious methods of problem solving. This was my favorite class and I learned so much as well as got an awesome starter film for my demo reel.
Friday, November 22, 2013
Editing and Stuff
"The effect you can get from juxtaposing different shots together in a film is unlike anything else in writing, or photography." -Vsevolod Pudovkin

Anyone who's ever edited anything thinks he/she is a great editor. It's the nature of the art. Learning how to cut clips and apply filters are easy to learn, and can create impressive looking material. However, just as there is a difference between Instagrammers and professional photographers, there exists a wide gap between a consumer cutting some clips on iMovie and a working editor. But what makes an editor great? Although I've come across a wide array of contrasting opinions on the topic, I've found a couple of attributes that most of the Internet could agree on:
1. Cut tight – The best editing approach is to cut tight scenes without becoming too “cutty”. This means taking out unnecessary pauses between actors’ delivery of dialogue lines. Sometimes it mean tightening the gaps within dialogue sentences through the use of carefully placed cutaways. It may also mean losing redundant lines of dialogue, after the director has reviewed your cut.
2. Temp music – Many editors like working with temporary music as a placeholder. I advise against this for two reasons. First – people tend to fall in love with the temp score and then it’s hard to get real music that feels as good. Second – temp music becomes a crutch. You tend to be more forgiving of a weak scene when there’s interesting music than when the scene is naked. I prefer to cut a strong scene and make it work through editorial solutions. If a scene can stand on its own, then the addition of sound effects and a score will make it that much better. The exception is a visual montage set to music. Here, I tend to do better when I’m cutting to music rather than the other way around.
3. No Dragnet edits – The original Dragnet television series used a certain approach to cutting dialogue scenes. Audio and video edits tended to be made as straight cuts between the actors without any overlaps as they delivered their lines. It followed this formula: cut to actor A – deliver the line; cut to actor B – deliver the line; cut back to actor A and so on. Walter Murch refers to this as the Dragnet-style of editing. Our brains seem to react better to edits where the change in picture and sound is not always together. These are called split edits, L-cuts or J-cuts.
4. Matching action – Matching actors’ hand positions, use of props, eyeline and stage position from one cut to another fall into the technical category of how to make a proper edit. Walter Murch offers a rule of six criteria that form reasons to make a cut at a given instance. The greatest weight is given to whether that cut drives the emotion of the scene or moves the story along. Technical matching is the least important concern. I’m not saying you should throw it out the window, because a mismatch that is too extreme can be very jarring to the audience. On the other hand, as an editor friend often tells me, “Matching is for sissies.” The audience will often ignore many minor continuity differences from one shot to the next if they stay totally engrossed in the story. Your job as the editor is to cut in such as way that they do.
5. Moving camera shots – Moving the camera around is a staple of action sequences. This might be a camera on a dolly, crane, Steadicam or just handheld. In an action scene, this is designed to create a level of tension. When I cut these shots together, I prefer to cut on movement, so that the camera is in constant motion from one shot to the next. Many directors and DP will disagree, preferring instead to start and stop each camera move before making the cut. Both approaches work under the right situations, but my tendency is to cut tighter and not let the audience’s eye rest on the set or a shot or a scene for too long, unless there is a reason to do so.
6. Don’t cut back to the exact same angle – If you have a choice of several camera angles, don’t automatically cut back to the same camera angle or take that you just used in the previous shot. This is, of course, unavoidable in a dialogue scene with only two angles and one take of each; but, if the director shot different takes with different framing, try to use a little of all of them. Don’t get stuck in a cutting rut, like master/single/reverse, master/single/reverse, etc. Mix it up.
7. B-roll shots in threes – When the scene calls for cutaway inserts, it feels right to use three on a row. Not a single shot, not two, but three. These should be at least 1.5-2 seconds long (or longer). An example might be when a character enters the room and looks around. The POV inserts work nicely in triplets and give the audience a good idea of the landscape that the character encounters. It mimics our real-world experience of moving our head around and seeing different aspects of the same surroundings.
8. Cut for the eyes – Actors that do well on TV and in films (as compared with the stage) are all very expressive with their face, but most importantly, their eyes. When I’m cutting an intense dialogue scene, I’m looking at how the actors’ eyes play in the scene. Do they convey the proper emotion? What is the reaction of the other actors in the scene? What the actors are or aren’t doing facially determines my cutting. It drives my decision to stick with the principal actor delivering the dialogue or whether I briefly cut away to see reactions from the others.
9. Pull the air out of actors’ performances – Going back to Item 1 – I like to cut tight. Recognize that many actors will overact. They will milk a scene for more than is appropriate. They will accentuate pauses, add more stumbles and stammers (where scripted) and give lengthy glances. Sometimes this works, but your job as the editor is to dial these back as you cut. Take these pauses out by cutting away and then back. Cut out redundant actions and line deliveries. Make it real, so it doesn’t feel like ACTING.
10. Shaping story – It is said that there are three films: the one that’s scripted, the one that’s been filmed and the one that’s edited. When you cut a feature, pay close attention to the story chronology and don’t be afraid to veer from what was written or filmed if it makes sense to do so. Many editors use note cards on a storyboard wall to create a quick visual representation of the storyline. This helps you make sure that you reveal things to the audience in the most logical order and that nothing is inadvertently edited out of place.
11. Digital aids – Modern NLEs and finishing techniques like digital intermediates offer a lot of tools that aid the filmmaker. For example, digital images are very tolerant of blow-ups. You can add camera zooms or blow-up a shot (creating a wide and a close-up from a single shot) with these tools. This is especially true if you shot on 35mm film or with the RED One camera, because the large image area of the film negative or camera sensor allows more overshoot space than HD cameras. Don’t be afraid to zoom in as long as the image quality holds up.
12. Make your choices, but be prepared for others – Your job as the editor is to shape the story and the pacing of the film. First and foremost this means you are there to help the director realize his or her creative vision. But you were also hired for your own best instincts. Most editors finish a first cut without the director sitting over their shoulder. During that time is your initial chance at putting your own stamp on the film. When the first cut is completed, the director and editor work together to refine that cut into the director’s cut.
Wednesday, November 13, 2013
4 Ways to Keep You From Saying "Fix it in Post"
In an article found on theblackandblue.com, were some advice geared toward the camera department that I find very convenient. These tips can really save the editor a lot of time in post production. On most sets, saving the editor time is not really on the top of their priorities, but it is something that can make post production occur with less mistakes. The first tip that Evan Luzi gives is to keep a camera report.


A camera report connects what is happening on set back to the editor. It gives the post production visual effects editor information such as the focal length of the lens used, to match its depth of field. It also makes it very convenient if you need to reshoot a shot. You know what focal length lens and f stop was used along with other vital information.
The second tip given has to do with transferring all production footage to a computer. Just transferring the files is not enough, but always make sure to back them up on one or even two separate hard drives to be safe. Be sure to get every single bit of data on to the various computers and hard drives. Don't ever trust that your computer storage is enough and just wont crash. That is not safe enough.
Most problems with data management come from human error. With that being said, make sure all memory cards are labeled correctly during production in order for things to go smoothly in post. Also make sure all hard drives are labeled and filed systematically. Name clips accordingly and keep things as organized and simple as possible.
The third tip mentioned to keep post production smooth is to make accurate slating a priority. Editing without slates means playing various clips to see what scene it was. When you have hours of footage and hundreds of clips, it is nearly impossible to edit without slates. All slates must be correctly labeled. Some may even include, frame rates, which special filters are unique to that scene, and lots of other important info.

The last tip that Evan has for film sets is to work closely with visual effects supervisor during filming. Any information that he or she can get about the shot they are manipulating will be very worth while during the editing process. It may not seem like a priority but it should be. Use tracking markers. Tracking markers are markers that you put with the scene that give the visual effects coordinator a reference point when it is on the computer. These few things may seem unnecessary but they will ensure that post production can go smoothly and flawlessly.
Friday, October 4, 2013
Log Gamma: The Shooting Mode Made for "Fixing it in Post"
Sierra, X-Pro II, Lo-Fi, Earlybird, Inkwell, Kelvin. Many of you recognize these color/luminance filters by name thanks to the well-known photo-sharing app; Instagram. Quite recently, I stumbled upon the realization that the photos posted on sites like Twitter, Tumblr, and even Facebook are, more often than not, corrected for color and/or luminance. When did it become natural for us to accept pictures like this:


Or this:

When in reality the scene probably looked more like this:

With the rise in color filters for photography, the increase in more dramatic video coloring was bound to follow. I mean, isn't video just a culmination of stills anyway? Despite this, editing color and luminance in post for video can prove slightly more difficult than editing for individual photos. For instance, most cameras' default settings are set to record only the bare minimum of information needed. (This is to reduce the size of the file; increasing the space on your SD card.) However, by failing to record the camera's full dynamic range, the amount of color, luminance, and contrast manipulation available to the editor is greatly depleted. This is where log gamma comes in.
Found on most modern-day digital cameras, log gamma offers the DP the option to shoot a scene as flat (color and luminance wise) as possible. Receiving footage shot in log gamma is pretty much an editor's dream come true; especially when consistent color throughout is essential to the piece.
Here you can see the increased amount of information recorded when shooting in "Canon Log" (flat) as opposed to shooting in the camera's "Normal 1" default settings.

The red gamma log line takes substantially longer to reach the top of the graph illustrating the increased amount of information recorded.
Unfortunately, there's a catch. While the final, edited footage shot in log gamma often looks incredible, the images you see on the camera beforehand don't. At all. Think shooting with a JVC-100 before you know anything about lighting and/or white balancing.
Here's a before and after shot of flat footage:

I don't know about you, but I don't think I could ever feel comfortable handing an editor video that looked anything like the picture on the left. Even if I knew that the ends would justify the means. To me, shooting in log gamma is like saying, "I'll fix it in post", before you even run into production problems. (Side-note: There are no production problems that cannot be fixed. Probably. So I've been told.) In conclusion, shooting in log gamma can greatly enhance the quality of your film. It is up to the DP to decide whether she can wait for the editor to reveal the beauty of her shots.
Sunday, September 25, 2011
8 1/2
I was really confused after watching 8 1/2, but after reading the lecture I came to appreciate Fellini's work. I gained another perspective about movies like these which change the world of film making. The way the movie is formatted made me feel like I was in a dream. It was hard to tell the difference between reality and dreams. Fellini succeeds in creating a world in which the inner conflicts of the main character crash with his real life by the use of flashbacks and dream sequences. This takes more in depth with the essence of this character. It think was really interesting to see the way Fellini portrayed the inner conscience of a character. Putting it in context with film history, the use of stream of consciousness in this movie is really innovative. It revolutionized the way stories were told in a movie, from just watching the action, to actually get into the character's through symbolism camera movements, and editing techniques. One of the examples I would like to use to show the way Fellini's technique can bring the audience inside the character's head is in the movie "American Beauty":
We see that by breaking the continuity of the movie, the desires of this character are revealed to us. This other example from the movie "500 Days of Summer" shows us the state of emotion of Joseph Gordon Levitt's character by including a dance sequence in what in real life would be this character only walking to work.
I think it is really cool that films can make people accept these conventionalities. It is also pretty cool that we can break some of the rules in film to innovate the storytelling of a story.
We see that by breaking the continuity of the movie, the desires of this character are revealed to us. This other example from the movie "500 Days of Summer" shows us the state of emotion of Joseph Gordon Levitt's character by including a dance sequence in what in real life would be this character only walking to work.
I think it is really cool that films can make people accept these conventionalities. It is also pretty cool that we can break some of the rules in film to innovate the storytelling of a story.
Monday, September 19, 2011
The Use of Flashbacks in 8 1/2
I have never seen 8 1/2 so my first impression of the movie was what they described in chapter 9 of "Closely Watched Films". I am really interesting in seeing it now, mostly because of the way they described Fellini's unique style of editing.
By seamlessly conjoining shots through match cutting (also referred to as continuity cutting), film viewers were encouraged to become involved in the illusion that they were watching, not a film made up of multiple bits and pieces of celluloid, but an unmediated reality. (165)Fellini used the editing, not to create an objective sense of reality, but rather to inv
ite the audience into Guido's mind. He throws continuity out the window and the film becomes a actual memory, with choppy edits and changing backgrounds to symbolize the distorting process of a memory and how uncertain they may be. It mirrors the wishful thinking and dreams of Guido as well as the visions of a traumatized child. It is a psychological ploy to step directly into the mind of the character. 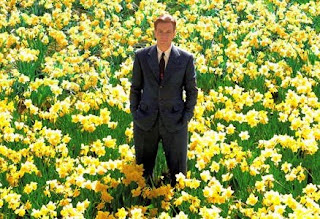 the flashback either follows that of the movie, or is flawless and almost dreamlike. For example, the movie Big Fish, which is predominantly told through the main characters flashbacks. However, whenever we do get a glimpse into his mind, it is a whole different world, mostly distinguished through the use of bright, fairytale like colors.
In many films, a fantasy or flashback is preceded by a ripple effect or a fading of the outline to distinguish the difference between reality and illusion. A look into the characters dilemmas through blurry images, harping music and an echoing subconscious. It distances the audience, rather than what Fellini intended to do in 8 1/2. It might be done by a particular repeating sound, such as in the show LOST, or maybe through a flash of lighting. But in many of these cases, the editing of
the flashback either follows that of the movie, or is flawless and almost dreamlike. For example, the movie Big Fish, which is predominantly told through the main characters flashbacks. However, whenever we do get a glimpse into his mind, it is a whole different world, mostly distinguished through the use of bright, fairytale like colors. Another example from a black and white movie would be Orson Welles, Citizen Kane. The movie alternates between the present and the past after the death of Kane and this clip shows on the first flashbacks to Kane's childhood. When the scene goes into the flashback of the main subject as a child, much as it does in 8 1/2, the shots fade into one another and the document we once saw slowly becomes a snowy day. The music also becomes louder and more involved, but the scene continues in a very cinematic manner.
Sunday, September 18, 2011
Editing and Acting!
Given that this week we have gotten really in depth into acting and ways actors should express emotion in front of a camera, I decided to make my post on the Kuleshow effect. Over the summer I decided to watch 2001 Space Odyssey again (last time I watched it I was 13, of course I didn't like it) because I felt that analyzing this movie would be really beneficial for me. After watching the movie I decided to research more about it, and this is when I found out about the Kuleshov effect. This effect was "discovered" by russian director Lev Kuleshov (hence the name). It is basically a technique of editing in which he alternated an emotionless shot of famous russian actor, Ivan Mozzhukhin, with three other different shots. After showing the same different montages with the same shot of Mozzhukhin to different audiences, Kuleshov demonstrated that in film acting the audience is the one to attributes an emotion to character, depending on the different shots the director decides to cut to.
According to the different audiences, in the first shot Mozzhukhin looks hungry when he the shots cuts to the plate of soup. on the second shot he looks sad, and on the third one they said he had desire for this woman.
Here is Alfred Hitchcock explaining the effect. I feel he makes a better job trying to explain the effect.
I think it is really interesting how this effect has influenced the acting and direction in the history of films. Going back to 2001 Space Odyssey, we found the effect in most of the shots of the computer Hal. Given that he is a computer he cannot show any kind of emotion, but the audience gives the computer human emotions by the way Kubrick intercuts between him and the crew members of the Discovery one.
The last part this video reveals to us that Hal feels betrayed and angry with the crew members just by the way it was edited. The shot of Hal is just a red dot, We don't even see any facial expression, but when it is intercut by Hal reading the crew members lips, the shot of Hal is more powerful. I feel that we can take this kind of editing in mind when we direct our actors during a scene.
8 1/2: Breaking the Rules and Paving the Way for the Future
For this week’s blog post, we were asked to read a chapter from Closely Watched Films by Marilyn Fabe. In the chapter it focuses on Federico Fellini’s film 8 ½. This unusual film broke a lot of the “rules” of cinema and helped pave a road for creative pieces of entertainment in the future. Overall after reading this chapter I came away with that certain “rules” of cinema could be broken with good reasons and intentions like how Fellini broke many of them in his strange and baffling film 8 ½.

8 ½ is a film about “director’s block” and tells the story of Guido Anselmi, a film director, who during the filming of his latest film, suddenly loses inspiration and worries he will not be able to finish and fail. One of the first “rules” Fellini “broke” was the non-linear story. The linear plot is constantly interrupted with Guido’s dreams, fantasies, and childhood memories that are triggered by present problems. This helps create a world of fantasy and makes it clear to the audience that this film is not about life but the make believe world of film. When first reading about this it reminded me of Christopher Nolan’s film Memento. That film is about Leonard Shelby who has anterograde amnesia searching for the killer of his wife. The film’s events are told in two separate narratives. One is told in chronological order in black and white and the other is told in color in reverse chronological order. As each sequence begins the audience is unaware of the preceding events just like the main character. Finally at the end the film’s narratives converge and everything makes a lot more sense. Memento in comparison seems a lot easier to understand and follow than 8 ½ and since I was confused during Memento I can’t even comprehend my level of confusion if I watched 8 ½.
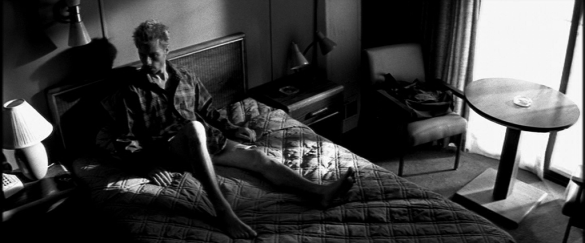


Another “rule” 8 ½ breaks is with editing. For example objects in the background and the orientation of people in the room move from shot to shot. This disrupts the viewer’s illusion of “reality” because in real life these kinds of things would not happen. However it makes perfect sense in the film because it helps capture the disoriented process of recalling memories, which the main character is doing. Try it yourself. It is hard to pinpoint the exact location of people and objects when recalling memories. In other words “rules” are meant to be broken but only with good reasons like Fellini had.

Like Memento, 8 ½ reminded me of a lot of other movies and television shows I have seen. First it reminded me of Six Feet Under when sometimes Fellini creates dream sequences or fantasies that are not really happening. Six Feet Under would use this method all the time to show what was really going on in their characters’ heads. Overall the plot of the film reminds me of two movies; Adaptation and Tropic Thunder. Adaptation is a Charlie Kaufman film about Charlie Kaufman’s difficult struggle to adapt The Orchid Thief novel into a film. It turns out it is based on upon his actual struggle when hired to write the film’s screenplay. Tropic Thunder is about a bunch of prima donna actors who are making a Vietnam War film based on the fictional novel Tropic Thunder. When their director becomes frustrated he decides to skip the script and drop them into the middle of the jungle to survive real action and danger. In the end the making of the film becomes the actual film in the film’s reality and is a worldwide smash! Sound familiar? Between these four movies and shows it is clear to see that Fellini’s movie paved the way for future strange and creative projects. It can take just one person to change the way we think and Fellini was definitely one for many people.
Subscribe to:
Posts (Atom)